A kitchen backsplash isn’t just a splash guard behind your stove, it’s one of the fastest ways to give your kitchen a complete personality overhaul. Whether you’re planning a full renovation or a quick weekend refresh, the right backsplash design pulls the whole room together while protecting your walls from cooking splatters and moisture. With 2026 bringing bold colors, unexpected textures, and budget-friendly options to the forefront, homeowners now have more creative freedom than ever. This guide walks you through eight standout backsplash design ideas that blend style with practicality, helping you find the perfect fit for your kitchen’s layout, budget, and aesthetic.
Table of Contents
ToggleKey Takeaways
- Kitchen backsplash design ideas now embrace bold colors, geometric patterns, and mixed materials like glass, stone, and metal to create personalized, designer-level looks.
- Subway tiles remain popular but are evolving with herringbone and vertical layouts using jewel tones and warm creams, while grout color choice significantly impacts the final aesthetic.
- Budget-friendly backsplash options like peel-and-stick tiles ($20–$50/sq ft), paintable panels ($2–$8/sq ft), and penny tiles ($3–$8/sq ft) deliver style without major renovation costs.
- Proper prep work including waterproofing, underlayment, and moisture barriers is essential to prevent mold and tile failure, especially behind stovetops and heat sources.
- Material selection requires balancing maintenance needs: glossy tiles hide grease but show fingerprints, matte finishes require less wiping, and natural stone demands regular sealing and professional installation.
- DIY success depends on realistic timeline expectations (2–3 days for 40 sq ft), proper tool investment like wet saws ($40–$60/day rental), and understanding when to hire a professional for complex designs.
Modern Tile Patterns and Textures
Subway Tiles and Contemporary Twists
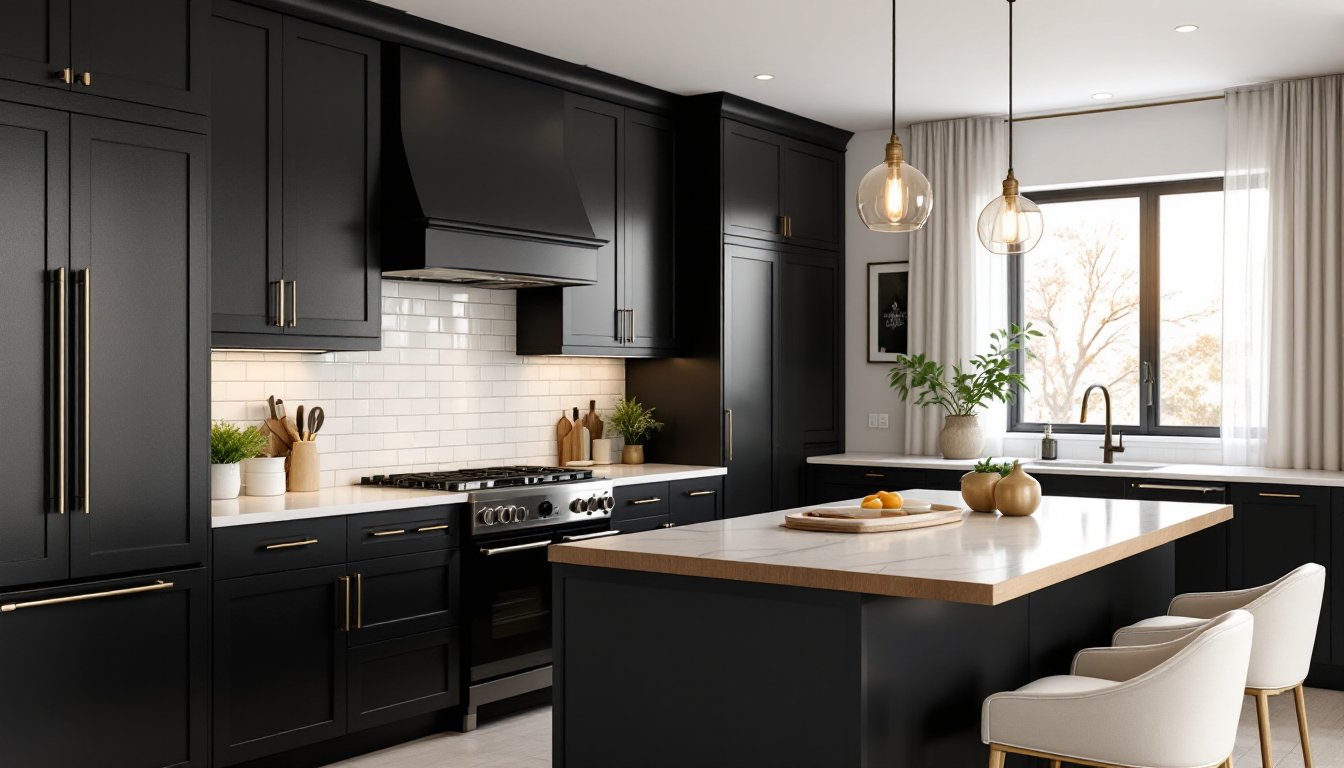
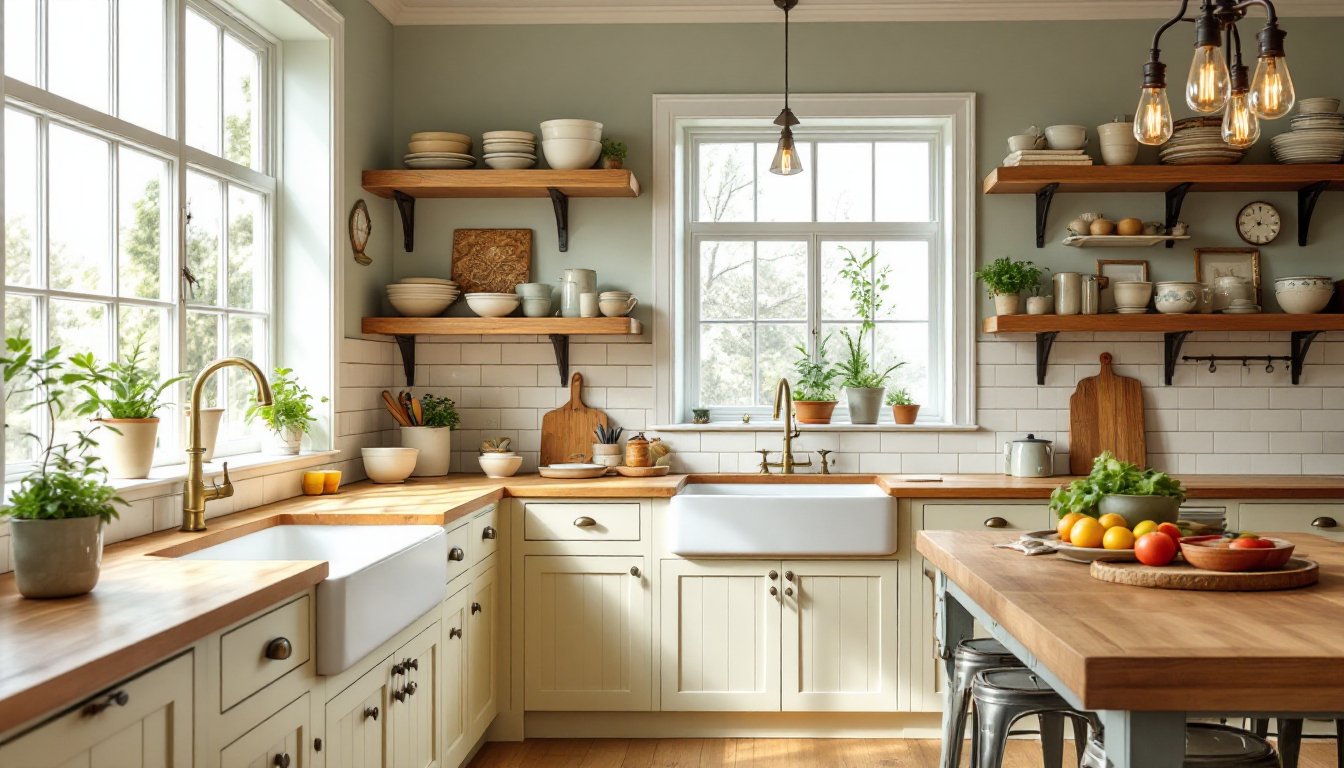
Subway tiles remain a kitchen staple, but 2026 is all about breaking the traditional 3×6 running bond pattern. Instead of plain white rectangles, homeowners are experimenting with colored subway tiles, soft grays, warm creams, and even muted jewel tones, laid in herringbone, vertical, or mixed orientations. The beauty of this approach is that you get the timeless appeal of subway tile with a modern edge that feels intentional, not dated.
When installing subway tiles, remember that grout color matters as much as the tile itself. A contrasting grout, charcoal or dark gray against light tiles, emphasizes the geometric pattern and adds visual weight. White grout on white tiles creates a seamless, minimalist look. Budget roughly $4 to $12 per square foot for subway tiles (material only), though premium varieties and installation labor will push costs higher.
One practical note: subway tiles require proper underlayment and waterproofing, especially near your stovetop. Moisture gets behind tiles faster than you’d think, so don’t skip the prep work.
Geometric and Mosaic Designs
If you want your backsplash to be a statement piece, geometric mosaics deliver. Think hexagons, diamonds, and interlocking patterns that catch the light and make your kitchen feel intentional. These designs work especially well in transitional or contemporary kitchens where there’s room for visual boldness.
Mosaics do come with a learning curve for DIY installation. Small tiles mean more grout lines, more cuts, and more opportunity for imperfection. If you’re confident with a wet saw and tile nippers, you can tackle this yourself. If you’re still building your skills, this is a good project to hire out, a tile professional will work faster and produce a cleaner result. Mosaic tiles run $8 to $20 per square foot before labor.
Color Palettes That Make an Impact
Gone are the days when kitchen backsplashes had to match or blend in. Today’s design trend embraces color as a tool for defining space and mood. Deep navy, forest green, and warm terracotta are reshaping what “kitchen colors” look like.
A bold backsplash color works best when your countertops and cabinetry are neutral, white, gray, or natural wood provide the breathing room a colored backsplash needs. If you’re unsure about committing to a vibrant shade, consider it a feature wall above your range or sink rather than wrapping the entire kitchen. This creates impact without overwhelming the space.
Light color backsplashes stay practical for busy kitchens, they hide grease splatters less obviously than dark finishes, making cleaning feel less frequent. Darker colors, conversely, show water spots and fingerprints more readily, so maintenance becomes part of the aesthetic compromise. Think about your daily routine before choosing. Interior Design Trends provide helpful examples of how bold backsplash colors integrate into full kitchen schemes.
Matte finishes hide smudges better than glossy tiles, making them a practical choice for high-traffic kitchens. Glossy tiles reflect light and make small kitchens feel larger, but they require more frequent wiping.
Budget-Friendly Backsplash Options
A stunning backsplash doesn’t require a five-figure budget. Peel-and-stick tile alternatives, paintable backsplash panels, and penny tiles offer style without the installation intensity or cost.
Peel-and-stick tiles range from $20 to $50 per square foot installed and work best in low-splash zones (not directly behind a stovetop where steam is constant). These are excellent for renters or anyone hesitant about permanent changes. The downside: durability is limited. They’ll last a few years before edges start curling, especially near heat sources.
Paintable backsplash panels are an underrated option. Beadboard, shiplap, or standard drywall painted with quality semi-gloss or satin kitchen paint costs roughly $2 to $8 per square foot and delivers a cohesive, budget-friendly look. You’ll still need to seal the area against moisture and ensure proper ventilation.
Penny tiles (small, usually round tiles) create a playful, textured look and are affordable at $3 to $8 per square foot. They’re labor-intensive to install because of the small size, but if you’re patient and detail-oriented, a DIY installation is feasible. Best Home Renovation Ideas often highlight budget-conscious backsplash projects that deliver visual impact without very costly.
Paint is always the cheapest option: high-quality semi-gloss kitchen paint on a properly primed and sealed wall costs under $50 for an entire backsplash area and can be refreshed in a weekend.
Statement-Making Materials and Finishes
Beyond ceramic and porcelain, backsplash materials now include glass, stone, metal, and even reclaimed wood, each bringing unique character and performance trade-offs.
Glass tiles create depth and luminosity, especially in small or dark kitchens. They’re non-porous, making cleanup effortless, but they show fingerprints and water spots readily. Budget $8 to $25 per square foot. Tempered glass is safer than standard glass around cooking zones.
Stone (marble, slate, granite) delivers luxury and uniqueness, no two natural stone surfaces are identical. The catch: stone is porous and stains easily. It requires sealing every 1-3 years depending on the stone type. Marble and slate cost $10 to $30 per square foot. This is a material where hiring a pro pays off: improper sealing ruins the investment.
Metal accents, copper, stainless steel, or brushed aluminum, pair beautifully with modern or industrial kitchens. Metal backsplashes hide fingerprints well and offer an unexpected elegance. They’re less forgiving than tile if you want to change your kitchen’s look later, so consider longevity.
Wood backsplashes are growing in popularity but require understanding: wood absorbs moisture and stains, making it unsuitable directly behind cooktops. Save wood for accent zones or consider thermally treated wood products designed for kitchens. Resources like Houzz’s curated range backsplash designs showcase how mixed materials create modern, layered looks.
Mix-and-match materials, tile with metal trim, stone with glass accents, are huge in 2026. These require careful planning but reward you with a bespoke, designer-level kitchen.
Practical Installation Tips for DIY Success
Before you open a box of tiles, understand what you’re taking on. A standard backsplash (roughly 40 square feet) takes a skilled DIYer 2-3 days, including drying time. Mistakes are expensive, ripping out poorly laid tile and starting over costs money and frustration.
Prep work is non-negotiable. Your wall must be clean, dry, and smooth. Fill gaps with caulk, sand rough spots, and prime any bare drywall. Moisture behind tiles leads to mold and loose tiles, so waterproofing matters. Use a tile backer board or waterproof drywall in moisture-prone areas, especially behind ranges. Don’t cut corners here.
Measure twice, cut once. Layout dry tile first without adhesive to plan cuts and ensure symmetry. Use tile spacers (usually 1/16 inch to 1/4 inch) to maintain consistent grout lines. Inconsistent spacing looks amateurish and is hard to hide.
Choose the right tools. A wet saw produces cleaner tile cuts than nippers alone. Rent one if you don’t own, it costs $40-60 per day and saves time and waste. A notched trowel (size depends on tile size: use 1/4 inch for small tiles, 1/2 inch for larger ones) spreads adhesive evenly. Uneven adhesive causes hollow spots and cracked tiles.
Adhesive and grout selection matters. Use thin-set mortar (not mastic, which fails in heat and moisture) for walls behind stoves. Epoxy grout resists staining better than standard grout but is harder to work with. Budget extra time for curing, most adhesives require 24 hours before grouting.
Wear safety glasses, dust masks, and gloves throughout. Tile dust contains silica, which damages lungs with repeated exposure. Work in ventilated spaces and wet-cut tiles to minimize dust. Home Renovation Ideas: Examples include step-by-step backsplash installations that break down the process into manageable stages.
Bringing Your Backsplash Vision to Life
The right backsplash transforms your kitchen from functional to fabulous, and with 2026’s range of styles, materials, and budgets, there’s truly something for everyone. Start by identifying what matters most: visual impact, ease of maintenance, durability, or budget. Then commit to thorough prep work and realistic expectations about your DIY skill level. A backsplash installed well lasts decades and becomes the backdrop for countless meals and memories. Choose wisely, take your time, and don’t hesitate to call in a professional if the project feels beyond your comfort zone. Interior Design Trends and similar resources on Home Renovation Ideas offer inspiration when you’re ready to start shopping for your perfect kitchen backsplash.