Kitchen walls are where a renovation pays dividends. Unlike appliances that age or countertops that require ongoing upkeep, the right wall design sets the tone for the entire room, and it stays. Whether you’re planning a full kitchen remodel or just refreshing tired surfaces, your choices in wall finishes, color, and materials can drastically change how the space feels and functions. The kitchen wall design ideas trending in 2026 blend practicality with personality, offering homeowners genuine options that work across different budgets and styles. This guide walks through seven strategies that actually deliver, from bold paint choices to textured finishes, with an eye toward what’s achievable for a committed DIYer.
Table of Contents
ToggleKey Takeaways
- Kitchen wall design ideas using bold paint colors like forest green or charcoal gray offer an affordable, high-impact transformation that sets the tone for the entire space.
- Test paint colors with a 2-by-3-foot patch under your kitchen’s specific lighting conditions for at least three days before committing to a full room.
- Tile backsplashes in modern layouts like herringbone or larger formats (6-by-12 inches) create dramatic visual impact while porcelain outperforms ceramic in durability and stain resistance.
- Open shelving demands intentional styling and organized display—shelves should be 12-18 inches deep and spaced vertically apart—to elevate your kitchen rather than appear cluttered.
- Shiplap and beadboard paneling offer forgiving DIY installation compared to tile, with material costs kept moderate and easy correction for mistakes.
- Removable peel-and-stick wallpaper provides a risk-free solution for renters and hesitant homeowners, with vinyl-coated options resisting moisture and grease in kitchen environments.
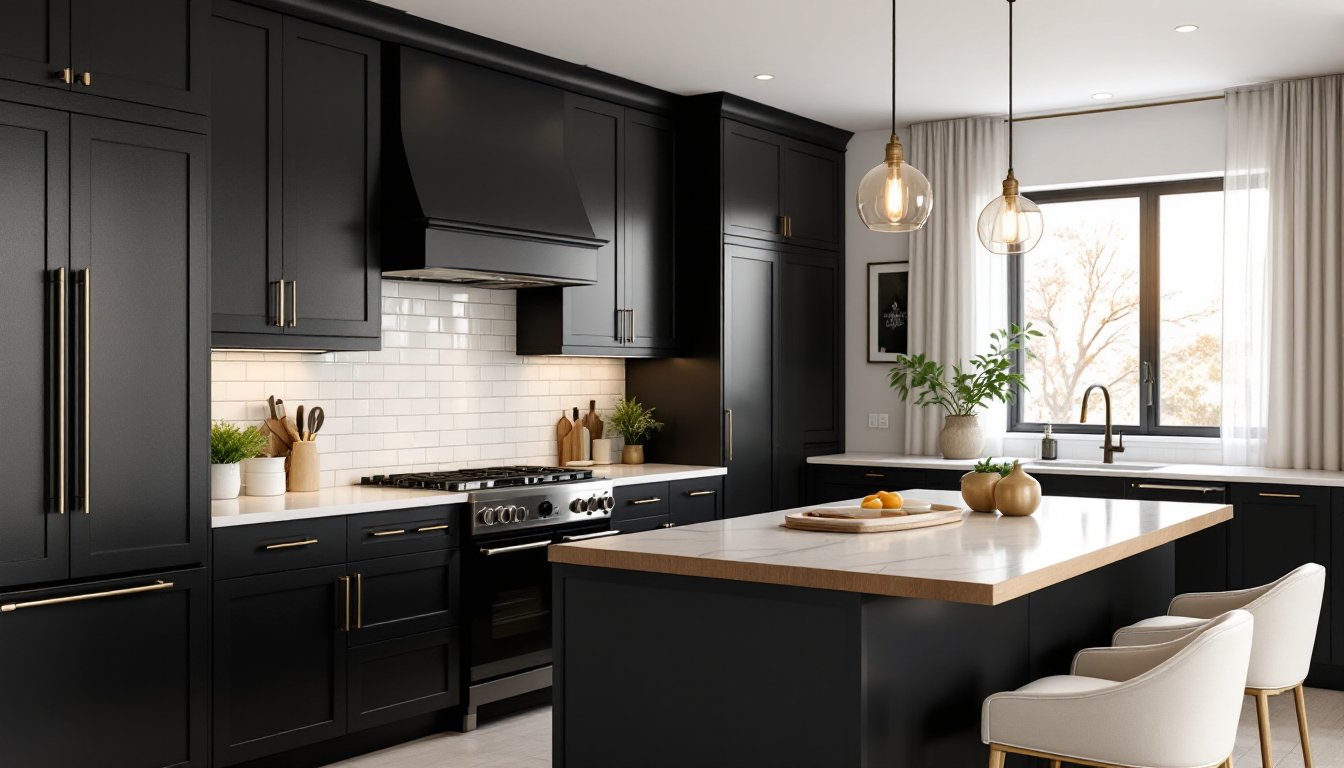
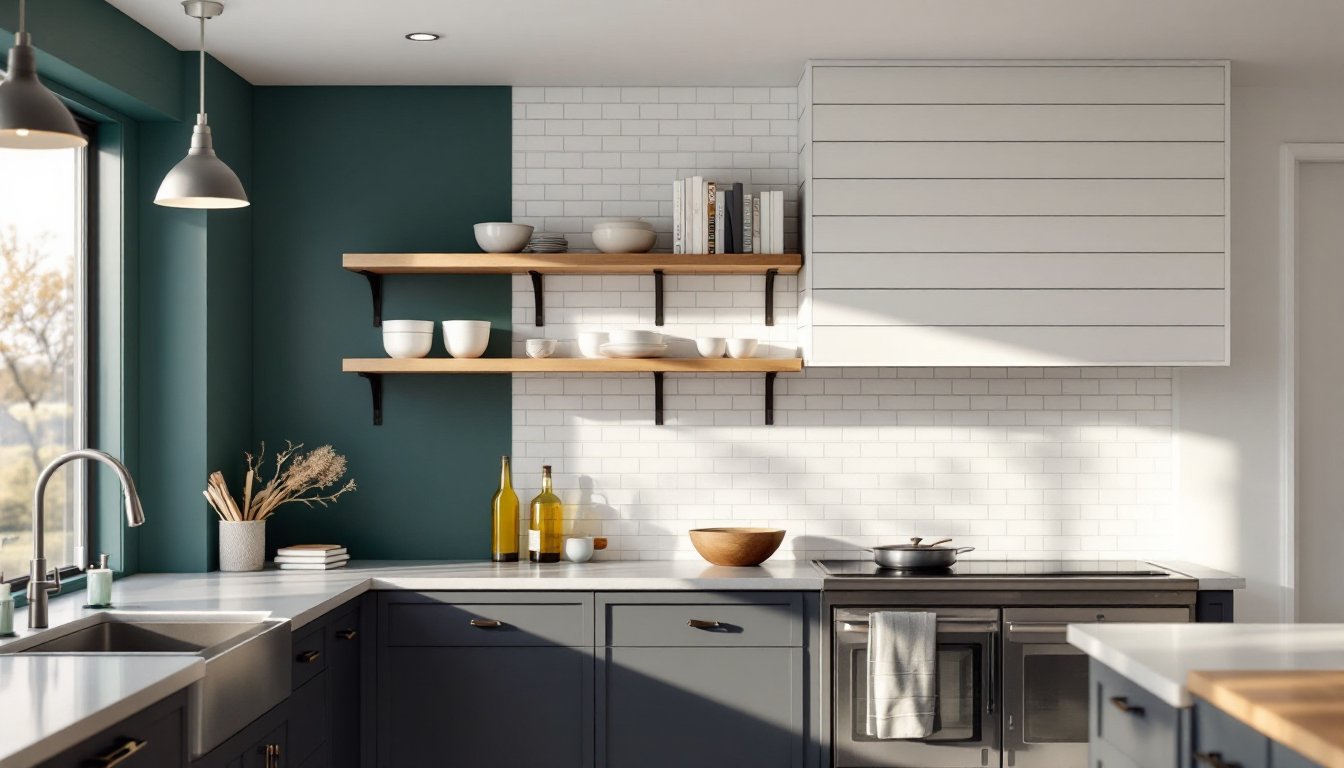
Bold Paint Colors and Accent Walls
A fresh coat of paint is the cheapest transformation a kitchen can get, and color choice matters more than most homeowners realize. Deep, saturated colors, think forest green, charcoal gray, navy blue, or warm terracotta, create visual weight and sophistication without the cost of tile or paneling. The trick is commitment: pick one wall or go all-in, but half-measures read as indecisive.
When picking a paint color for kitchen walls, account for lighting. Natural light shifts throughout the day, and kitchen overhead lighting (often fluorescent or cool LED) can make warm colors look sallow or cool colors look clinical. Buy a quart of your top choice and paint a 2-by-3-foot test patch. Live with it for three days, checking it at different times.
Prep is non-negotiable. Strip or sand glossy finishes, fill holes and cracks with spackle, and prime any stained areas or previously bold colors with a quality primer. Kitchen walls take splatter and moisture, so use a semi-gloss or satin finish paint, flat finishes show every handprint. Quality matters here: a premium kitchen paint with mildew resistance and durability will look better longer than budget options.
Tile Backsplashes and Wall Finishes
Subway Tiles and Modern Alternatives
Subway tile is the safe choice because it works. Classic 3-by-6-inch white tiles in running bond installation (the staggered pattern that looks like brickwork) suit nearly any kitchen style. But if you want movement, consider a herringbone or chevron layout, it’s the same tile, different installation, and the visual impact shifts dramatically.
Modern alternatives to subway include larger format tiles (6-by-12 or 12-by-12 inches) that reduce grout lines and give a cleaner look. Porcelain is more durable than ceramic for backsplashes: it resists staining and moisture better. Honed marble or concrete-look porcelain adds warmth where glossy subway feels cool. These finishes aren’t harder to install, the layout just changes your visual story.
Textured and Patterned Tiles
Textured tiles add depth that flat surfaces can’t match. Raised geometric patterns, embossed designs, or handmade tiles with uneven surfaces catch light and shadow, making walls feel alive. Patterned tiles (Moroccan zellige, Spanish encaustic, or contemporary geometric prints) make bold statements without relying on paint.
Installing tile requires clean substrate, proper mortar spread, and grout applied with skill. A backsplash tile install is manageable for DIYers, measure twice, work in small sections, and use spacers for consistent grout lines. For large areas or special patterns, consider hiring a professional: mistakes get expensive. Grout itself comes in colors that can complement or contrast your tile choice, so don’t treat it as afterthought. Sealed grout resists staining better than unsealed, especially in kitchens where splatters happen. These finishes shown beautifully on design platforms help you see before committing.
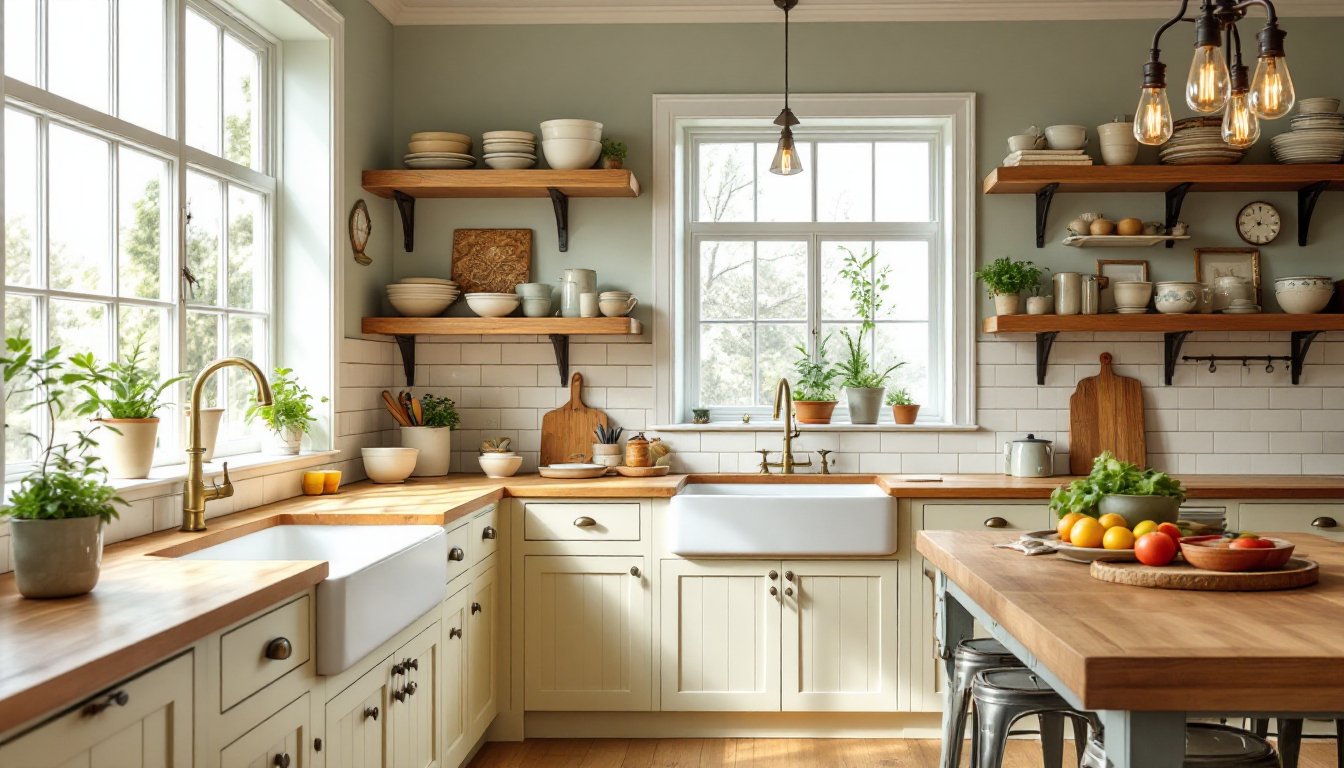
Open Shelving and Display Walls
Open shelving trades cabinetry for visibility, and it works when executed with intent. Floating shelves supported by internal steel rods or brackets anchored to wall studs create display surfaces for cookbooks, ceramics, or glass bottles. The kitchen reads lighter and more open, but there’s a catch: open shelves demand constant styling and ruthless organization.
If you’re committing to open shelving, plan the layout on paper first. Shelves should be 12-18 inches deep (deep enough for a dinner plate, not so deep that items get lost in back). Space them 12-18 inches apart vertically, close enough to fill wall space, far enough apart to avoid a cluttered wall. Use quality brackets rated for 75+ pounds per shelf: kitchen items add weight fast. Mount brackets directly into studs or use heavy-duty toggle anchors if studs don’t align with your design.
The wall behind open shelves becomes part of the display. A fresh paint color, tile backsplash, or shiplap backdrop elevates the whole setup. Stock your shelves deliberately: group items by color or function, leave breathing room, and rotate pieces seasonally. Poorly styled open shelving reads as clutter: well-designed shelves become a kitchen’s focal point. Consider this when planning broader home renovation ideas for your kitchen space.
Shiplap, Beadboard, and Paneling
Shiplap, horizontal boards with overlapping edges, brings farmhouse charm or coastal calm depending on color and finish. Modern shiplap is often MDF or engineered wood rather than solid boards, which keeps costs down but demands careful installation. Boards are typically 5.5 inches wide, finished smooth or with grooved edges, and available in white, gray, or natural tones.
Beadboard is similar but with vertical grooves running along each board, creating a refined, cottage-style texture. It works well as a wainscot (lower wall treatment, usually 36-42 inches high) paired with paint or wallpaper above. Full-wall beadboard in a kitchen works, too, light colors keep it from feeling too busy.
Installation requires a level surface and studs to anchor into. Shiplap boards are installed horizontally with the overlap facing down so water sheds away: use a stud finder, attach boards with finish nails or construction adhesive, and fill nail holes with paintable caulk or wood filler. Expect bumps along the first board to throw subsequent boards off-level, start straight, and use shims where needed.
These finishes suit different kitchen styles. Shiplap reads country or modern depending on paint color and hardware. Beadboard suits traditional or cottage kitchens. Both are easier than tile for DIYers, and mistakes are forgivable, bad nails come out, boards can be re-stained. Material costs are moderate, and labor is your main investment if hiring professional installation.
Wallpaper and Removable Finishes
Wallpaper has undergone a quiet revolution. Modern peel-and-stick wallpaper removes cleanly without damage, and quality options rival traditional paste-applied papers in appearance and durability. Removable wallpaper suits renters and homeowners hesitant to commit to permanent color, peel it off in months or years without stripping or sanding.
Kitchen wallpaper should resist moisture and grease. Look for vinyl-coated or vinyl wallpaper, not fabric-backed paper. Avoid heavily textured papers that trap dust: flat or subtly raised patterns clean easier. Bold geometric prints, botanical motifs, or subtle geometric textures all trend for 2026, but remember that patterns show wear faster than solids in a food-prep area.
Application requires a clean, smooth surface. Fill holes, sand rough patches, and prime with wallpaper primer for better adhesion. Measure and plan your layout before cutting, wallpaper strips align better with advance planning. Smooth out bubbles with a plastic scraper as you apply. Seams matter: butt joints (edges touching) are preferable to overlaps, which collect grease and peel. If wallpaper intimidates you, design platforms and installation guides offer step-by-step tutorials and inspiration.
Peelable wallpaper costs slightly more than paste-applied but saves the removal hassle later. For renters or those testing a color commitment, it’s worth the premium. Permanent wallpaper, when applied correctly, lasts 10+ years in a kitchen if the room has decent ventilation and you don’t cook in smoke-producing quantities.