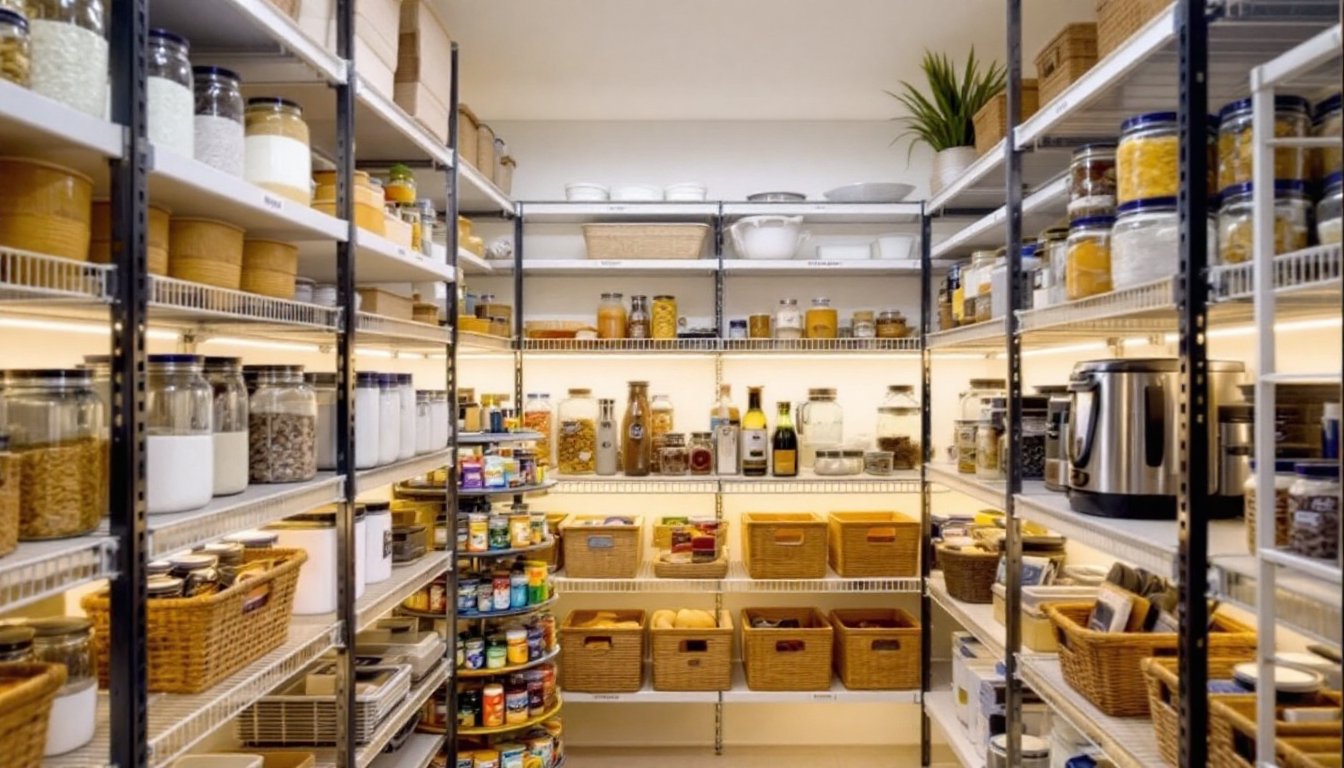
A well-designed walk-in pantry transforms how you shop, cook, and organize your kitchen. Instead of hunting through crowded cabinets or forgetting what you already own, a thoughtfully planned pantry puts everything at arm’s reach and makes meal prep smoother. Whether you’re renovating a kitchen or carving storage from an existing closet, the right design combines smart shelving, strategic lighting, and systems that actually fit your household’s habits. This guide walks you through the key decisions that turn a walk-in pantry from a cluttered catch-all into a functional, organized space.
Table of Contents
ToggleKey Takeaways
- Maximize vertical space with adjustable shelving systems that accommodate 6–7 shelves in standard 8-foot ceilings, allowing you to adapt storage as your household needs change.
- Choose a walk-in pantry layout—galley-style for narrow spaces or L-shaped for square rooms—that minimizes wasted corner space and maintains at least 24–30 inches of clear aisle width.
- Install LED strip lights under each shelf to illuminate items on middle and lower shelves, complemented by 300–400 lumens of ceiling lighting for optimal visibility and label readability.
- Organize by category and frequency of use, placing daily-use items at eye level (30–60 inches high) and storing rarely used items on top or bottom shelves.
- Use clear storage containers, labels, and lazy Susans for spices and condiments to prevent forgotten items and keep food fresh while maximizing pantry organization ideas.
- Test your organization system for a few weeks before declaring it complete, adjusting shelf heights and storage zones based on actual household habits rather than ideal theory.
Maximize Vertical Space With Smart Shelving Solutions
Vertical space is your pantry’s best asset. Most people leave it unused, stacking items haphazardly on a few shelves. Start by measuring floor to ceiling, most standard 8-foot ceilings give you room for 6 to 7 shelves if spaced correctly.
Adjustable shelving is essential because your storage needs change. Modular systems (like heavy-duty metal rack systems or wooden adjustable shelves) let you adapt as your family grows or dietary habits shift. Metal shelving handles heavier loads (canned goods, bulk items) better than particleboard, but it’s noisier and requires anchoring to studs if you’re mounting it directly to walls.
Consider shelf depth carefully. Standard 12-inch-deep shelves suit most pantry items, dry goods, cans, jars. Deeper shelves (16 inches) work for bulk storage but make items at the back hard to reach. Narrower 8-inch shelves suit smaller spaces or upper shelves where you store lighter items like spices.
Don’t forget the corners and dead zones. Pull-out sliding shelves or rotating corner units (lazy Susans scaled up) prevent the “black hole” effect where items disappear into deep corners. They cost more but recover usable space that would otherwise sit empty. For a budget option, use shallow bins or wire baskets on standard shelves to organize smaller items and keep them visible.
Choose the Right Layout for Your Kitchen Pantry
Your pantry’s layout depends on the room’s shape and how you move through it. The wrong layout wastes space and creates bottlenecks.
Galley-Style Pantries for Narrow Spaces
A galley layout, shelves on both long walls with a walking aisle between them, works best for narrow spaces (typically 3 to 5 feet wide). This arrangement maximizes wall coverage without feeling cramped. You can easily access items from either side without reaching across.
For galley pantries, 48-inch-tall shelving on one side and 60-inch on the other prevents the space from feeling too symmetrical. Stagger heights to improve sightlines and reduce the tunnel effect. Ensure the aisle stays at least 24 to 30 inches wide, anything narrower makes it hard to open doors or maneuver items in and out.
L-Shaped and Corner Configurations
L-shaped layouts fit square or nearly square rooms better. Place longer shelving on one wall and shorter shelving on an adjacent wall, creating a natural work zone in the corner. This setup accommodates a small prep surface or counter if needed, turning the pantry into a light staging area for unpacking groceries.
Corner units deserve special attention. Dead corners are common culprits for wasted space. A corner lazy Susan, pull-out cabinet system, or angled shelving retrieves items that would otherwise stay out of reach. In a 5-by-7-foot pantry, fixing the corners alone can recover 10 to 15 square feet of functional storage.
Lighting and Visibility Essentials
You can’t organize what you can’t see. Overhead lighting alone isn’t enough, shadows hide items on middle and lower shelves, especially in deeper pantries.
LED strip lights mounted under each shelf solve this problem elegantly. They’re affordable (roughly $20–$50 per kit), run cool, and draw minimal power. Mount them on the underside of shelves using adhesive backing or screws, directing light downward to the shelf below. Wire them to a single switch for convenience, or add battery-operated versions if hardwiring isn’t practical.
For the ceiling, a 60-watt-equivalent LED bulb in a recessed fixture or simple ceiling-mounted fitting provides baseline brightness. Aim for 300 to 400 lumens in a typical pantry, enough to read labels without being so bright it feels like a storage warehouse. Ensure the fixture sits near the room’s center and isn’t blocked by shelves.
Consider light temperature. Warm white (2700K) feels cozy but dims colors: cool white (4000K) is cleaner and makes it easier to spot item labels and colors. Neither is “right”, it depends on your preference and how your kitchen’s existing lighting leans. Motion-sensor switches save energy if you’re in and out frequently, though they’re overkill for most home pantries.
Organization Systems That Actually Work
Smart shelving and lighting only work if you have a system for what goes where. Generic “organize everything” advice fails because it ignores how real families use pantries.
Start by categorizing: dry goods (pasta, rice, flour), canned goods, snacks, breakfast items, baking supplies, oils and condiments. Within each category, group by frequency of use. Daily-use items sit at eye level (roughly 30 to 60 inches from the floor). Weekly items go higher or lower. Rarely used specialty items (holiday baking supplies, bulk backup) claim the top or bottom shelves.
Use clear storage containers for dry goods. Mason jars, plastic canisters, or purpose-built airtight bins keep food fresh, prevent pest access, and let you see what’s inside without opening packages. Label everything with a label maker or tape, your eyeball memory fails faster than you’d think. Rice and pasta look identical in bulk: so do flour and sugar.
For pantry organization ideas, consider tiered shelf risers or stackable bins that let you fit more into less vertical space. Lazy Susans work for spices and condiments, rotating them to prevent forgotten bottles at the back. Small wire baskets corral snack packs, individually wrapped items, and loose small goods.
Don’t skip the door. Over-the-door organizers hold spices, small jars, or packets in a surprisingly compact footprint. Just don’t load them so heavily that the door strains, most pantry doors aren’t rated for 50+ pounds of weight. Resources like The Kitchn and Apartment Therapy offer detailed walkthroughs of various organization systems that suit different pantry sizes and styles.
One final rule: acclimate your space. Live with your system for a few weeks before declaring it “done.” You’ll discover which heights are most comfortable, which categories need bigger zones, and which items you actually use versus the ones you thought you’d use. Adjustment beats perfection.
Conclusion
A functional walk-in pantry isn’t about Instagram aesthetics, it’s about knowing what you own, accessing items easily, and wasting less food and money. Vertical shelving, smart lighting, a sensible layout, and thoughtful organization systems are the building blocks. Start with measurement and a clear picture of what you need to store, then build outward. With these fundamentals in place, your pantry becomes the organized, efficient space every kitchen deserves.